Cloud Storage Load Generator (Snowflake)
- DarkLight
Cloud Storage Load Generator (Snowflake)
- DarkLight
Article Summary
Share feedback
Thanks for sharing your feedback!
Overview
The Cloud Storage Load Generator is a wizard that helps users load delimited data from public objects in Google Cloud Storage.
Unlike common components, the Cloud Storage Load Generator does not appear as a standalone component when added to the Matillion ETL job canvas. Instead, the load generator takes the form of a wizard that allows users to load and view files on the fly, altering load component properties and seeing their effects without the need for a separate Transformation Job. The Load Generator can also guess the schema of a table, relieving much of the end user's work.
Please Note
- This component requires working Google Cloud Platform credentials with "read" access to the bucket that contains the source data's file(s). You can do this by attaching an IAM role to the instance when launching Matillion ETL for Snowflake (GCP); however, it can also be managed by editing a Matillion ETL environment.
- Matillion requires use of a policy that contains the gs:ListBucket action, such as the policy provided in Manage Credentials.
- This guide presumes that you have launched a Matillion ETL for Snowflake instance. To begin with this step, read Launching Matillion ETL for Snowflake - GCP.
The following section explains how to configure the Cloud Storage Load Generator in Matillion ETL for Snowflake, on GCP:
Configuring the Cloud Storage Load Generator wizard
1. Create an Orchestration Job in your chosen Project.
_0.0.1.png)
2. In the Components tab, search for the Cloud Storage Load Generator, and drag it on to the canvas.
_0.0.2.png)
Please Note
The three-page Cloud Storage Load Generator wizard will open in the Get Sample page after the component has been added to the canvas.
3. In the Google Cloud Storage field, use to select a file from an existing Google Cloud Storage bucket.
Please Note
This file must be delimited (including .csv) and the user must have permission to access the file.
4. In the Compression field use the drop-down menu provided. If the file is compressed, the correct compression method must be selected; the supported compression method are gzip and BZip2.
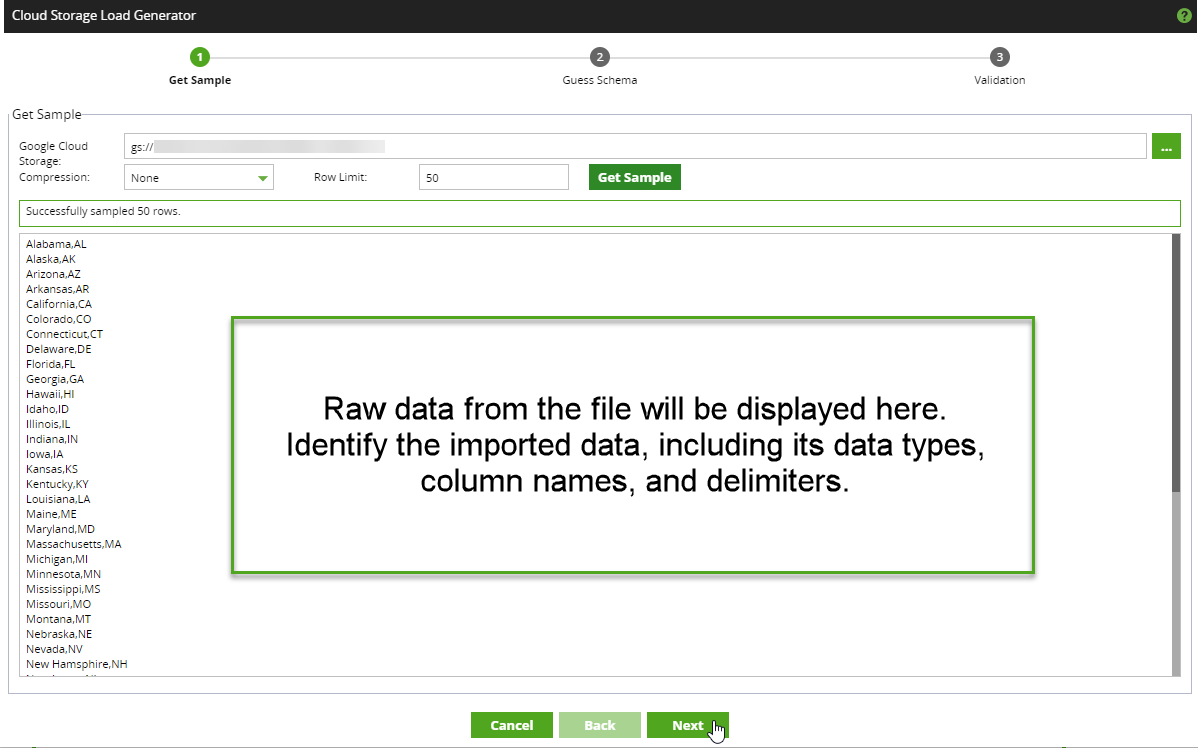
5. In the Row Limit field, select the number of rows to be returned from the sample file, then click Get Sample.
Please Note
The wizard will load the intended file's data and attempt to guess the schema. The raw data will be displayed in the sample box, situated underneath the aforementioned fields.
6. Click Next to progress to the next page of the wizard.
7. In the Guess Schema page, the input file's data will be automatically displayed in the section at the top of the dialog. Scroll through the list to view the entirety of the data.
8. Column data is displayed in the lower-right panel, and is available for editing.
9. Schema Configuration properties are displayed in the lower-left panel. Modify the fields relevant to the file type. The available properties are detailed in the next section of the document, see Properties.
10. Click Next to progress to the final page of the wizard.
Please Note
Clicking Guess Schema will order the Cloud Storage Load Generator to attempt to guess as many of these properties as possible. However, all of the properties are available for manual editing by the user, as described above.

11. On the Validation page, the input file's data will be displayed in the panel at the top of the dialog.
12. Use the Integrations drop-down menu to select the Snowflake storage integration of your data, configured in Snowflake.
13. To view the resulting table's output, click Test.
Please Note
Running a test will create the requested table and show a sample for the user to inspect.
14. To modify the output data, click Back to return to previous steps within the wizard, and make property and column alterations.
15. Click Create & Run to complete the wizard.

The wizard will close, return users to the job canvas, and create two linked components; Create Table and Cloud Storage Load. Both of these components have been parameterized by the Cloud Storage Load Generator, and can be run as a job by linking to a Start component.

Properties
| Property | Setting | Description |
|---|---|---|
| For more information on all the settings in this component, see the Google Snowflake COPY syntax. | ||
| Table Name | String | A human-readable name for the table. |
| Field Delimiter | String | A delimiting character for fields (columns). The default is a comma ,. A TAB character can be specified using the backslash key and the TAB key. |
| Field Optionally Enclosed By | String | Character used to enclose strings. The value can be NONE, a single quote, or a double quote. To use the single quote character, use the octal or hex representation 0x27, or the double single-quoted escape ''. |
| Ignore Header Rows | Integer | The number of lines at the start of the file to ignore. |
| Date Format | String | Defaults to 'auto' - this can be used to manually specify a date format. |
| Time Format | String | Defaults to 'auto' - this can be used to manually specify a time format. |
| Timestamp Format | String | Defaults to 'auto' - defines the format of timestamp values in the data files to be loaded. |
| Escape Unenclosed | String | Single character string used as the escape character for unenclosed field values only. Default is a backslash. |
| Escape | String | Single character used as the escape character for any field values. |
| Null As | String | This option replaces the specified string with null in the output table. Use this if your data has a particular representation of missing data. |
| Trim Blanks | Checkbox | When ticked, Matillion ETL removes trailing and leading whitespace from the input data. |
| Error On Column Count | Checkbox | When ticked, a parsing error is generated when the number of delimited columns (fields) in the input data file does not match the number of columns in the corresponding table. |
| Empty As Null | Checkbox | When ticked, empty columns in the input file will become null. |